Imagine driving home late at night, and suddenly both of your high beams or dashboard lights go completely dark. Your first thought might be that your expensive bulbs burned out simultaneously. However, before you rush out to buy replacement bulbs or schedule a costly visit to a mechanic, there is a very high chance that a simple, two-dollar plastic fuse is the actual culprit.
Fuses are the unsung heroes of your car’s electrical layout. They are designed to act as safety shields. If an unexpected power surge travels through your headlight or tail light circuit, the fuse intentionally breaks its internal connection to stop the excess electricity from melting wires or causing a fire. Replacing a blown lighting fuse is an essential DIY skill every driver should know. Here is how to do it safely.
Step 1: Locate Your Vehicle’s Fuse Boxes
Most modern vehicles have at least two fuse boxes. One is located under the hood near the engine or battery, housed in a black plastic box. The second box is usually tucked away inside the cabin, underneath the steering column, or behind a removable plastic panel near the driver’s left knee. Check your owner’s manual to find the exact location for your lighting fuses.
Step 2: Read the Diagram and Identify the Correct Fuse
On the inside lid of the fuse box cover, you will find a printed diagram labeling what each fuse controls. Look for abbreviations like “HD LPT” (Headlight Left), “FOG LAMP”, or “TAIL”. The diagram will also state a number, such as 10A or 15A. This tells you the maximum current (Amperage) that specific fuse can handle.
Step 3: Remove and Inspect the Fuse
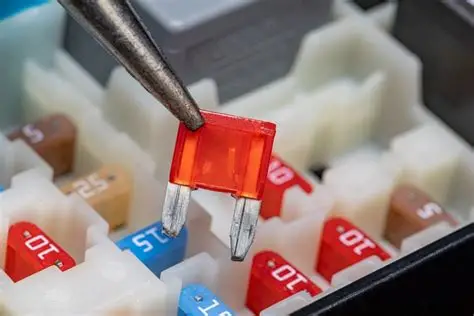
Using the small plastic fuse puller tool (usually clipped inside the engine bay fuse box lid) or a pair of needle-nose pliers, gently pull the suspect fuse straight out. Hold the fuse up to a bright light source. Look through its clear plastic body. If the curved metal wire inside is broken into two pieces, or if the inside looks burnt and black, the fuse is blown.
Step 4: Install a Match-Rated Replacement
Never bypass a blown fuse with a wire, and never install a higher amperage fuse than what is recommended (for example, putting a 20A fuse where a 10A fuse belongs). Doing so can melt your entire wiring harness. Simply push a brand-new fuse of the exact same color and amperage rating into the empty slot. Flip your light switch on to confirm the system works perfectly again!